Difference between revisions of "Application Note: NIS Devices configuration"
m |
m (→Usage) |
||
| (One intermediate revision by the same user not shown) | |||
| Line 13: | Line 13: | ||
= Usage = | = Usage = | ||
| + | |||
| + | == Connect to USB stick == | ||
| + | <br> | ||
| + | |||
| + | First, the USB stick should be connected: Select the correct COM port from the menu and press connect | ||
| + | <br> | ||
| + | [[File:ModuleApp.png|Module APP windows]] | ||
| + | <br> | ||
| + | |||
| + | == LoRa Device Config == | ||
| + | <br> | ||
Open "LoRa device config" in config Menu. The following display will show up : | Open "LoRa device config" in config Menu. The following display will show up : | ||
| Line 22: | Line 33: | ||
The "Authentication Key" field must be filled up with the App<span style="color:#00FF00">S</span>Key of the device to be configured. | The "Authentication Key" field must be filled up with the App<span style="color:#00FF00">S</span>Key of the device to be configured. | ||
| + | <br> | ||
== Reading device == | == Reading device == | ||
| − | + | <br> | |
When ready, user should set the device in "Test mode" as explained in the wiki (e.g. [[NIS-TR_Temperature_Sensor_(RTD)#Test_mode|Test mode for NIS-TR]] ). Then if you press "Read Device" button the following window should pop up. | When ready, user should set the device in "Test mode" as explained in the wiki (e.g. [[NIS-TR_Temperature_Sensor_(RTD)#Test_mode|Test mode for NIS-TR]] ). Then if you press "Read Device" button the following window should pop up. | ||
| Line 33: | Line 45: | ||
- device to be read is set in "Test mode" (Led of the device should blink regularly) | - device to be read is set in "Test mode" (Led of the device should blink regularly) | ||
- correct devUid and App<span style="color:#00FF00">S</span>Key has been entered. Please note that the key is the App<span style="color:#00FF00">S</span>Key and not the AppKey | - correct devUid and App<span style="color:#00FF00">S</span>Key has been entered. Please note that the key is the App<span style="color:#00FF00">S</span>Key and not the AppKey | ||
| + | |||
| + | == Writing device == | ||
| + | |||
| + | Just push to the Write Dev button. | ||
| + | <br> | ||
| + | If the device has been disconnected from Test Mode you just need to put it again in Test mode and write the device (you don't need to read it again). | ||
| + | |||
| + | == Applying new configuration == | ||
| + | |||
| + | Depending on the parameters, the configuration could be used directly or you might need to restart the device, | ||
| + | To do so | ||
| + | -a) remove, insert battery | ||
| + | -b) Set the magnet around 20 seconds (until it stop blinking and then remove it immediatly) | ||
| + | |||
| + | After restart you may need to set the device back to IDLE mode, A join will be performed by LoRaWan device. | ||
Latest revision as of 09:07, 14 January 2019
Contents
1 Configuration with Nemeus USB stick
Most of Nemeus devices can be reconfigured thanks to Nemeus USB stick and MM002 Java application.
In addition of the Java application and the USB stick, it needs Yaml File for the device configuration.
2 Usage
2.1 Connect to USB stick
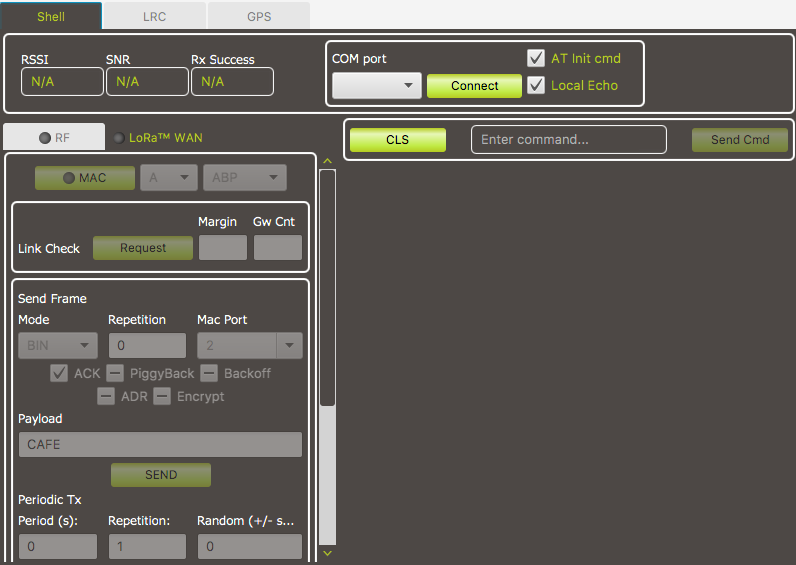
First, the USB stick should be connected: Select the correct COM port from the menu and press connect

2.2 LoRa Device Config
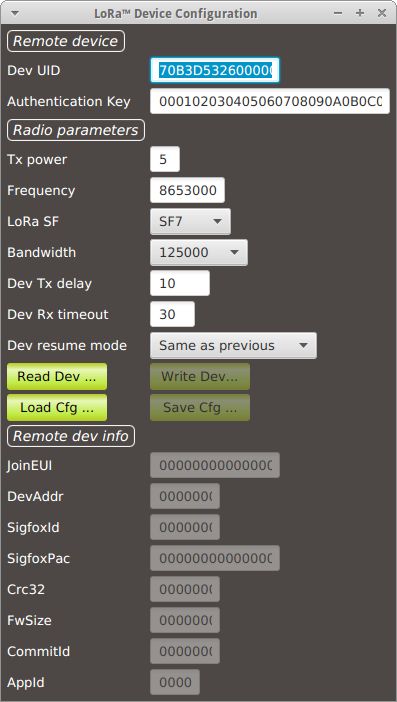
Open "LoRa device config" in config Menu. The following display will show up :
The "devUid" field must be filled up with the device Uid of the device to be configured.
The "Authentication Key" field must be filled up with the AppSKey of the device to be configured.
2.3 Reading device
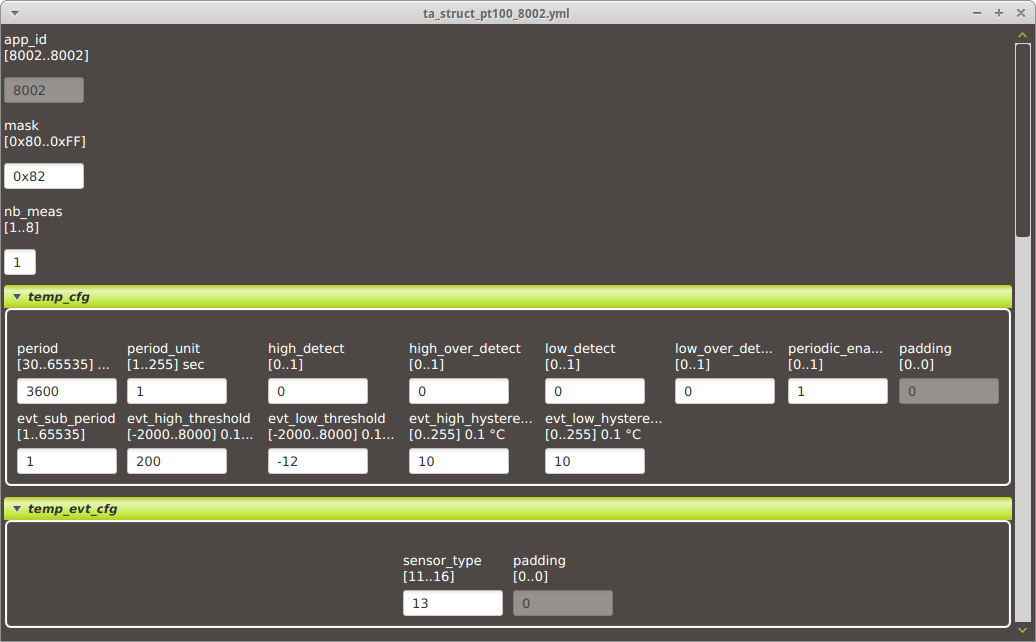
When ready, user should set the device in "Test mode" as explained in the wiki (e.g. Test mode for NIS-TR ). Then if you press "Read Device" button the following window should pop up.
This is an example for NIS TR product. If the window did not show up, please verify the following point:
 - device to be read is set in "Test mode" (Led of the device should blink regularly)
 - correct devUid and AppSKey has been entered. Please note that the key is the AppSKey and not the AppKey
2.4 Writing device
Just push to the Write Dev button.
If the device has been disconnected from Test Mode you just need to put it again in Test mode and write the device (you don't need to read it again).
2.5 Applying new configuration
Depending on the parameters, the configuration could be used directly or you might need to restart the device, To do so
 -a) remove, insert battery
 -b) Set the magnet around 20 seconds (until it stop blinking and then remove it immediatly)
After restart you may need to set the device back to IDLE mode, A join will be performed by LoRaWan device.

