Smart IoT Sensor - Getting Started
Contents
1 First Steps
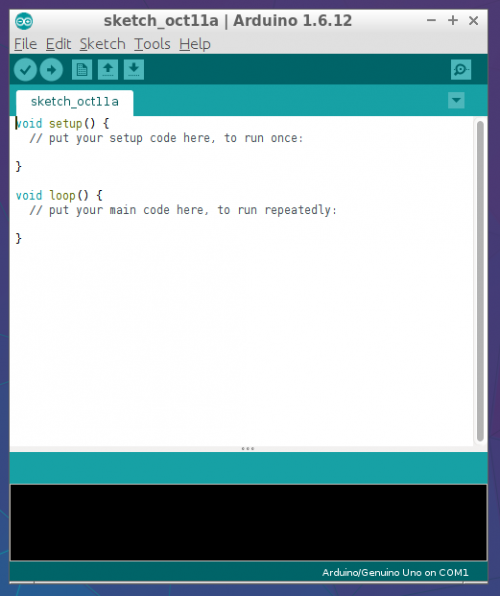
The Smart IoT Sensor is shipped with the pre-loaded Blink program.
- Connect to Smart IoT Sensor to the PC with a micro USB cable. The Led blinks periodically.
To try examples and develop your own application, the IDE and toolchain must be installed. The following section describes the steps to install the Arduino IDE and dependencies to work with the Smart IoT Sensor.
2 IDE and toolchain installation
2.1 Arduino IDE installation
Get the latest version Arduino IDE and follow the needed steps to install on your computer. Once installed you can execute the IDE and follow next steps.
On Windows, you can choose between downloading the Installer (.exe) or the Zip package. We suggest to choose the first one because it installs directly everything needed to use the Arduino IDE, including the drivers. With the Zip package, the drivers must be installed manually.
Still, the support for the Atmel SAMD MCU on the board must be added. See the following section.
2.2 Atmel SAMD Support Installation
On the Arduino IDE, the SAMD MCU is not supported by default. In order compile and upload for the Smart IoT Sensor, the package for the Arduino/Genuino Zero (which use the SAMD MCU) must be downloaded. This is very easy folling these steps:
From the Arduino IDE, install the latest SAMD boards support:
- Open the Board Manager window from the Tools>Board: "Arduino/Genuine Uno">Board Manager...:

- Enter SAMD in the search field, select Arduino SAMD Boards (32-bits ARM Cortex-MO+) and click on Install with the latest version:
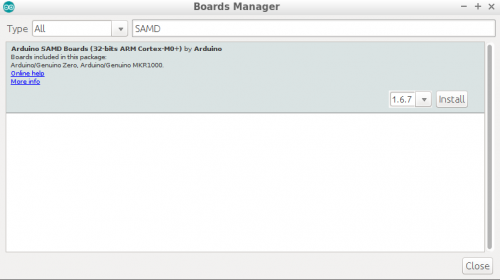
The Board Manager will download the package (around 50MB) and install it.
- You are now able to choose the Arduino/Genuino Zero (Native USB Port):
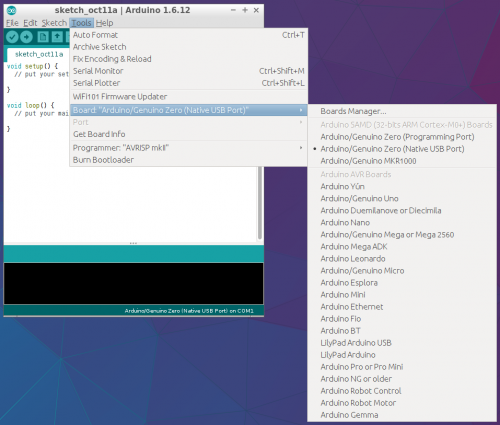
In the board list, you can notice that both "Native USB Port" and "Programming Port" are selectable. the Native USB Port must be choosen to download the binaries with the USB cable. The Programming Port is also available on the Smart IoT Sensor but a debugger must be used to download the binaries (the procedure is explained at the end of this guide).
Now, you are able to compile programs and download them into the SAMD MCU of the board. The last step is to install the libraries of the modules and sensors included int the Smart IoT Sensor. With them, it will be easy to create complete applications in just a few hours.
2.3 Libraries importation
There is two ways to download the libraries: manual download with direct link or with the Sketch>Include Library>Manage Libraries... menu in the Arduino IDE. Both methods are described if available.
- For the embedded GPS (SIMCom SIM33ELA module):
- Arduino IDE: Sketch>Include Library>Manage Libraries... and search for MicroNMEA by Steve Marple and install the lastest version.
- Direct Download: Download the MicroNMEA lib and follow the instructions at the end of this list to install it.
- For the LoRa Communication (Nemeus MM002 module):
- Direct Download: Download the Nemeus lib and follow the instructions at the end of this list to install it.
- For the accelerometer (Analog Devices ADXL345 sensor)
- Arduino IDE: Sketch>Include Library>Manage Libraries... and search for Adafruit ADXL345 by Adafruit and install the lastest version.
- Direct Download: Download the ADXL345 lib and follow the instructions at the end of this list to install it.
- For the temperature sensor (Bosh BMP280 sensor)
- Arduino IDE: Sketch>Include Library>Manage Libraries... and search for Adafruit BMP280 Library by Adafruit and install the lastest version.
- Direct Download: Download the BMP280 lib and follow the instructions at the end of this list to install it.
- The "generic" sensor wrap-up:
- Arduino IDE: Sketch>Include Library>Manage Libraries... and search for Adafruit Unified Sensor by Adafruit and install the lastest version.
- Direct Download: Download the unified sensor lib and follow the instructions at the end of this list to install it.
If you have used the Arduino IDE to install all the libraries, you can skip this part. The following instructions are for installing the libraries downloaded from direct link.
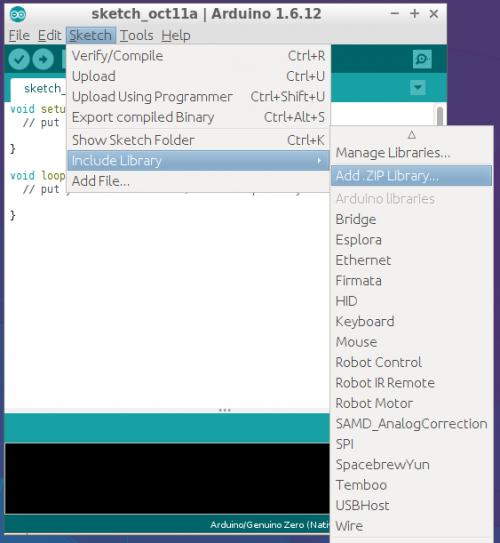
- Do not unzip the downloaded libraries, leave them as is. In the Arduino IDE, navigate to Sketch>Include Library. At the top of the drop-down list, select the option to Add .ZIP Library.
- You will be prompted to select the library you would like to add. Navigate to the downloaded libraries .zip files location and select them. The name of the library must only contain alphanumeric characters (ASCII only, without space. Cannot start with a number).
- Restart the Arduino IDE.
- In the the Sketch>Import Library menu, you can now see the new libraries at the bottom of the drop-down menu. You can use them in your sketchs. Zip files will be copied into the libraries folder in your Arduino sketches directory under Arduino/libraries.
With the installation of the Nemeus library for the LoRa module, several examples are exposed in the File>Examples>Nemeus menu. You can try them on the board.
3 Connect the board
The USB connection with the PC is necessary to program the board.
- Connect the board to your computer using a micro USB cable.
If you have connected a battery, the charging circuit should set the red LED on until battery is fully charged, indicated with the green LED.
4 Upload your first sketch
- Once you have opened an application example or made your own, you can select the Arduino/Genuino Zero (Native USB port) int he Tools>Board menu.
- The Smart IoT sensor should have been recognized by the OS.a serial/COM port must have been onpened. In the Arduino IDE, you can now select the Smart IoT Sensor in the Tools>Port' drop-down list, it'll be indicated as an Arduino/Genuino Zero board.
- If you have a successful upload, you'll get a bunch of red text that tells you that the device was found
and it was programmed, verified & reset
5 Manual recovery
If you uploaded a bad sketch that crashes, you may be unable to re-flash your board. In that case, no more COM/Serial port appears in the Arduino IDE. To recover from this, double click the reset button to force bootloader mode. You should get back into the bootloader and see the new COM/Serial.
Once it is in bootloader mode, you can select the newly created COM/Serial port and re-try uploading.